We know how important it is to notice and reply to all those buyer messages. And how badly it may hit you if you miss some or forget to reply – order handling issues may arise, Amazon communication metrics go down etc. That’s why we created a Mailbox for you.
When you sign up, the system creates an internal unique email address for you (typically – <random>@inbox.drop2amz.com) The next thing to do is configure your Mailbox to receive buyer messages. Once you do that, all your new buyer messages will start appearing on in your inbox and you will be able to reply to them here as well.
Mailbox Overview
You can open Mailbox from the top navigation bar by clicking an envelope icon or from your Account dropdown.

On the top right corner you can see your mailbox address that you use to configure forwarding buyer messages, along with Check Mail button (refresh icon) Using the Configure link you can configure some Mailbox options, like Default Signature (appended to new messages you compose) or whether to show Other folder in Mailbox (Other folder holds all non-buyer messages coming to your mailbox)
Search bar is located right below the header – enter a search term or email to search for some specific emails.
Search filter is also applied for all folders
On the left side you can see Folders panel and Recent Contacts list. Folders include:
- Buyer Messages – incoming Amazon buyer messages
- Other – holds all non-buyer messages coming to your mailbox
- Sent – all your sent emails appear here
- Replies – your replies to incoming emails
- Direct – direct emails (eg. from Recent Contacts or from Order view)
- Automatic – emails sent automatically by the system (eg. Order status emails)
On the right side you actually see the list of emails for selected folder (and matching search criteria, if any) Clicking the email line opens the Email View.
Email View
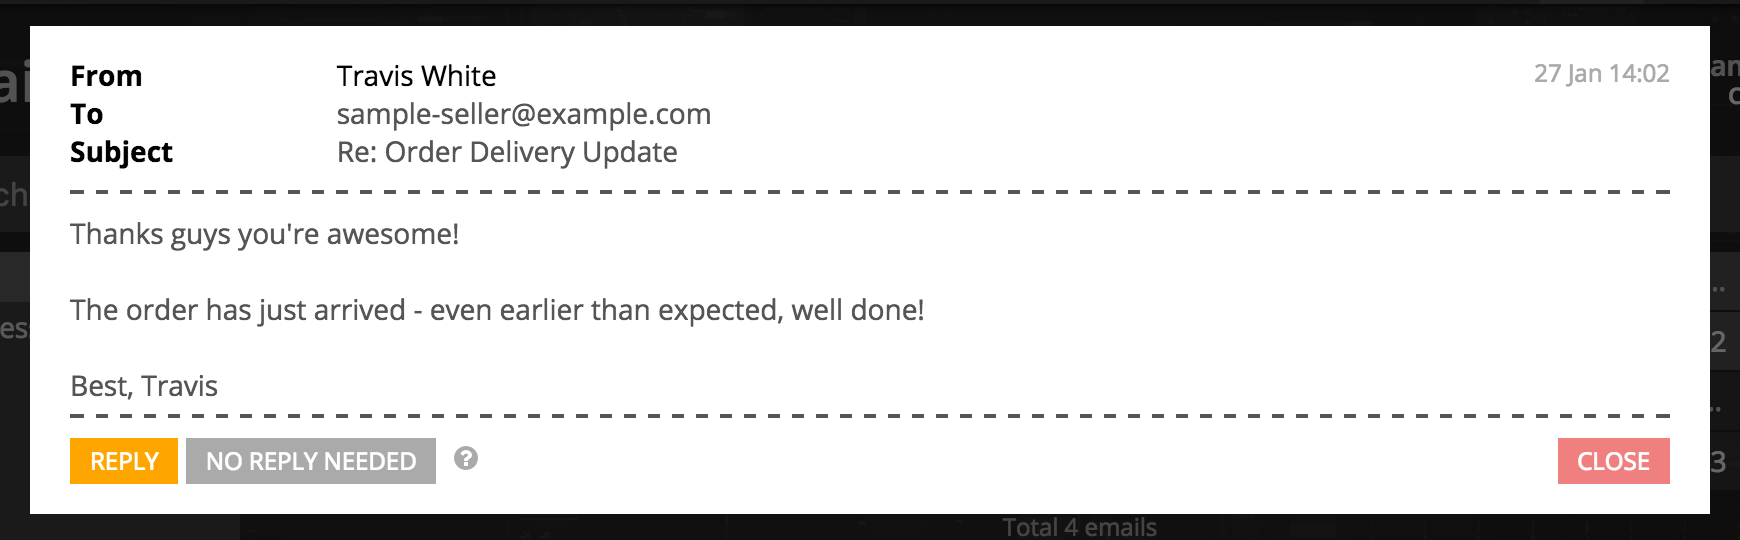
The email view is pretty simple. You can reply to the message with the Reply button. If you already replied to this message elsewhere or marked as no reply needed on Amazon – you can click No Reply Needed.
No Reply Needed button simply clears Reply Needed state of an email on drop2amz. It DOES NOT mark it as no reply needed on Amazon! You must reply to buyer messages, otherwise your Amazon communication metrics will go down and threaten your account health, eventually resulting in suspension and ban.
Configuring Your Mailbox
In order to receive buyer messages to your Mailbox on drop2amz, you have to set up forwarding emails coming from ***@marketplace.amazon.com to your drop2amz mailbox address. This greatly depends on the email provider you use.
When you configure forwarding, your mail server will send a confirmation email to your internal drop2amz mailbox with an activation URL. Find this email in your Mailbox on drop2amz and follow the link to confirm email forwarding.
Configuring Buyer Email Forwarding with Gmail
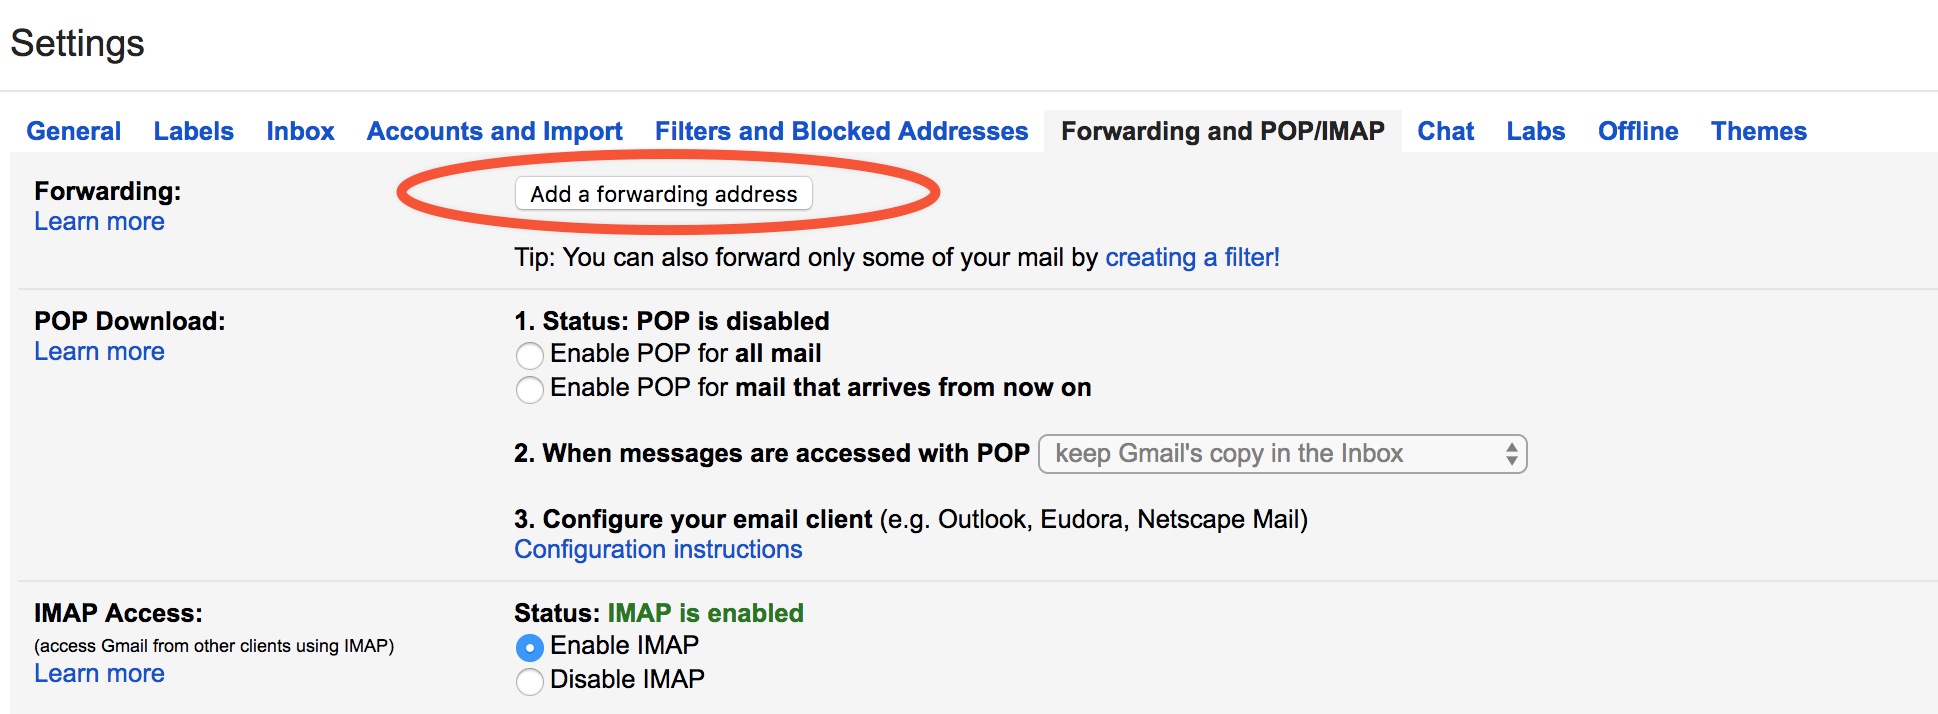
- Initially you need to add your internal drop2amz email address as a forwarding address in your Gmail. To do so follow this link https://mail.google.com/mail/u/4/#settings/fwdandpop and click Add forwarding address button:
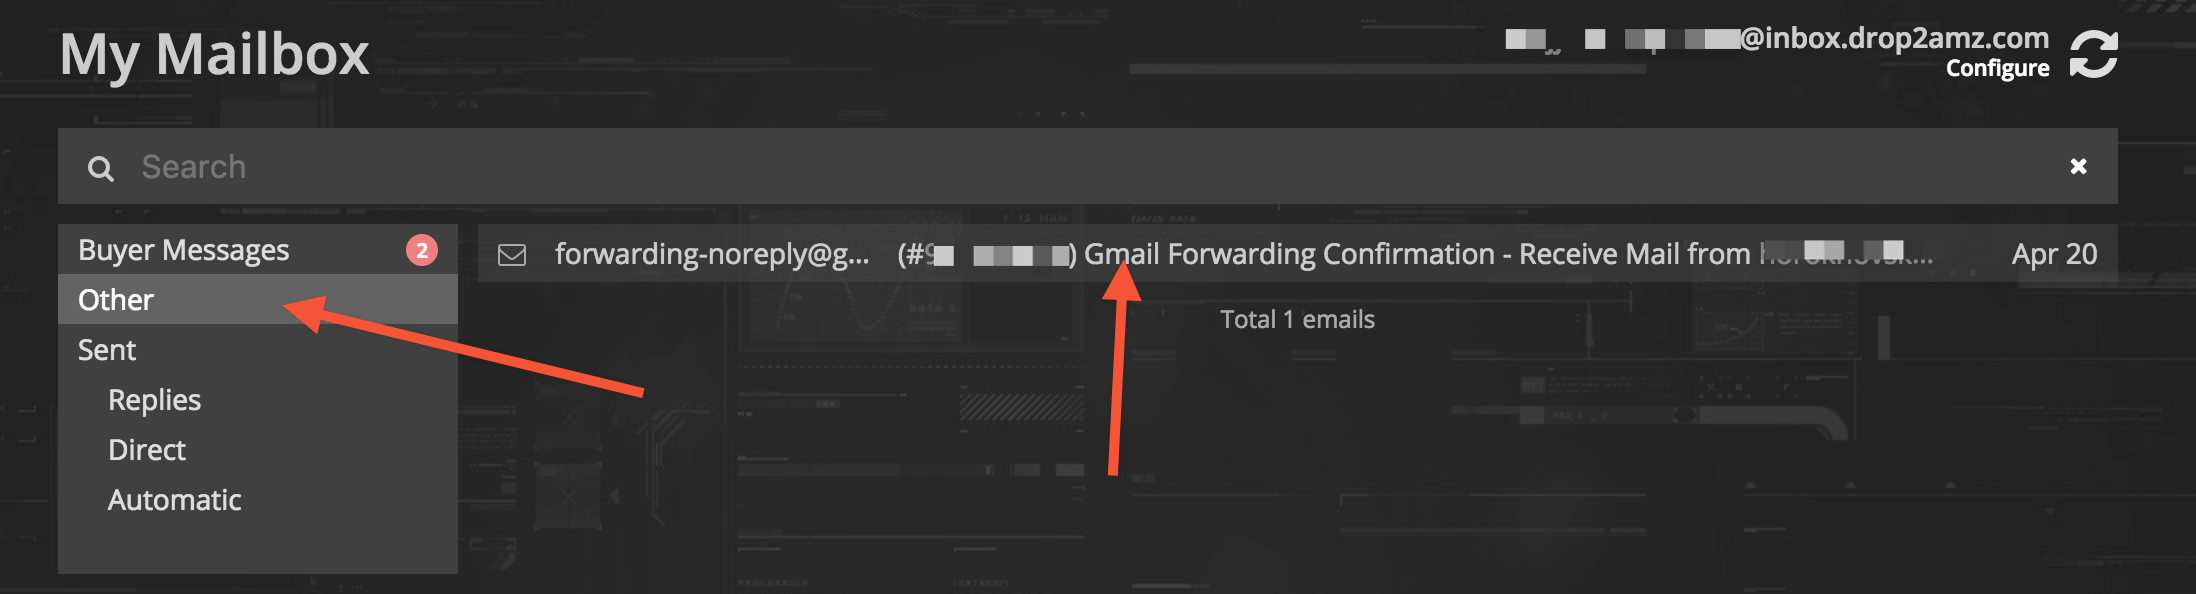
- Now you have to confirm adding this forwarding address – open your Mailbox on drop2amz, locate the Other folder and find the forwarding confirmation email from Gmail (it may take some time for this email to arrive, be patient) Follow the activation URL in the email to confirm this forwarding address:
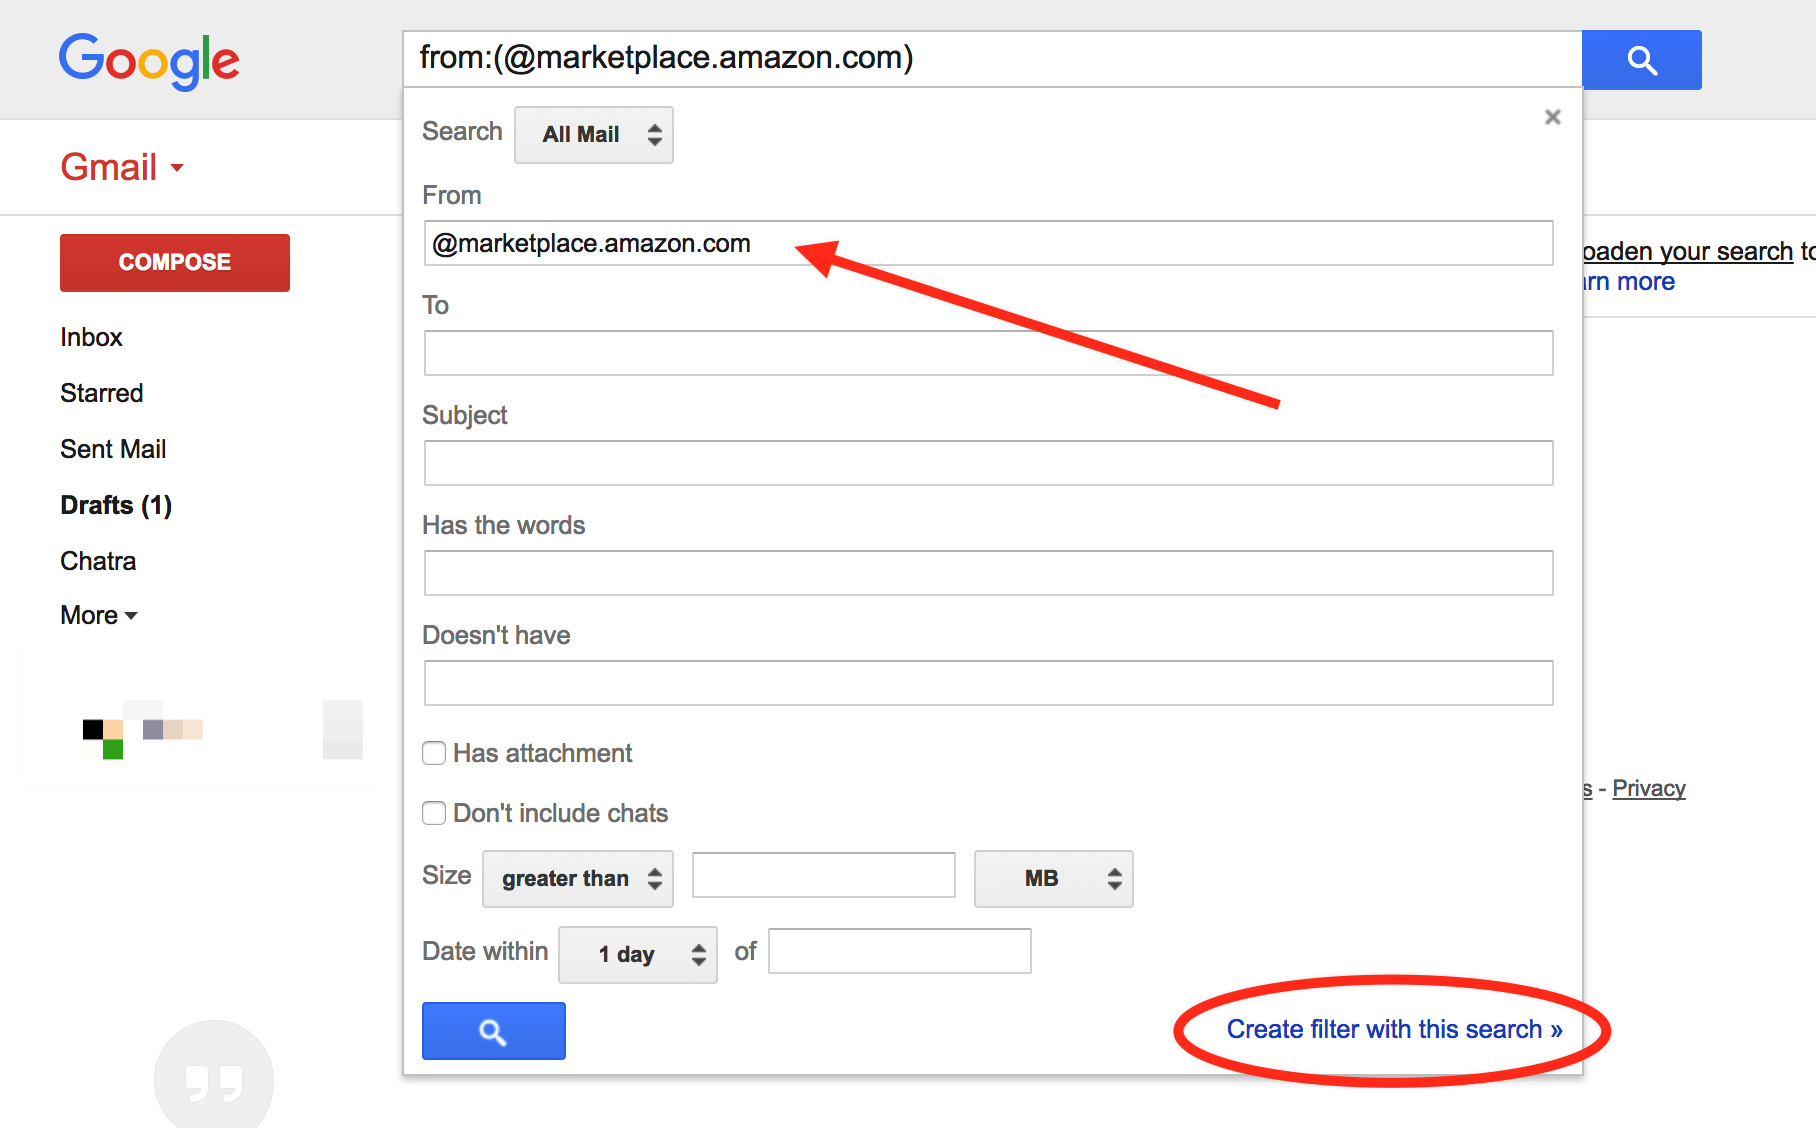
- Now create a filter in Gmail by specifying @marketplace.amazon.com in the From field like shown below, and click Create filter with this search:
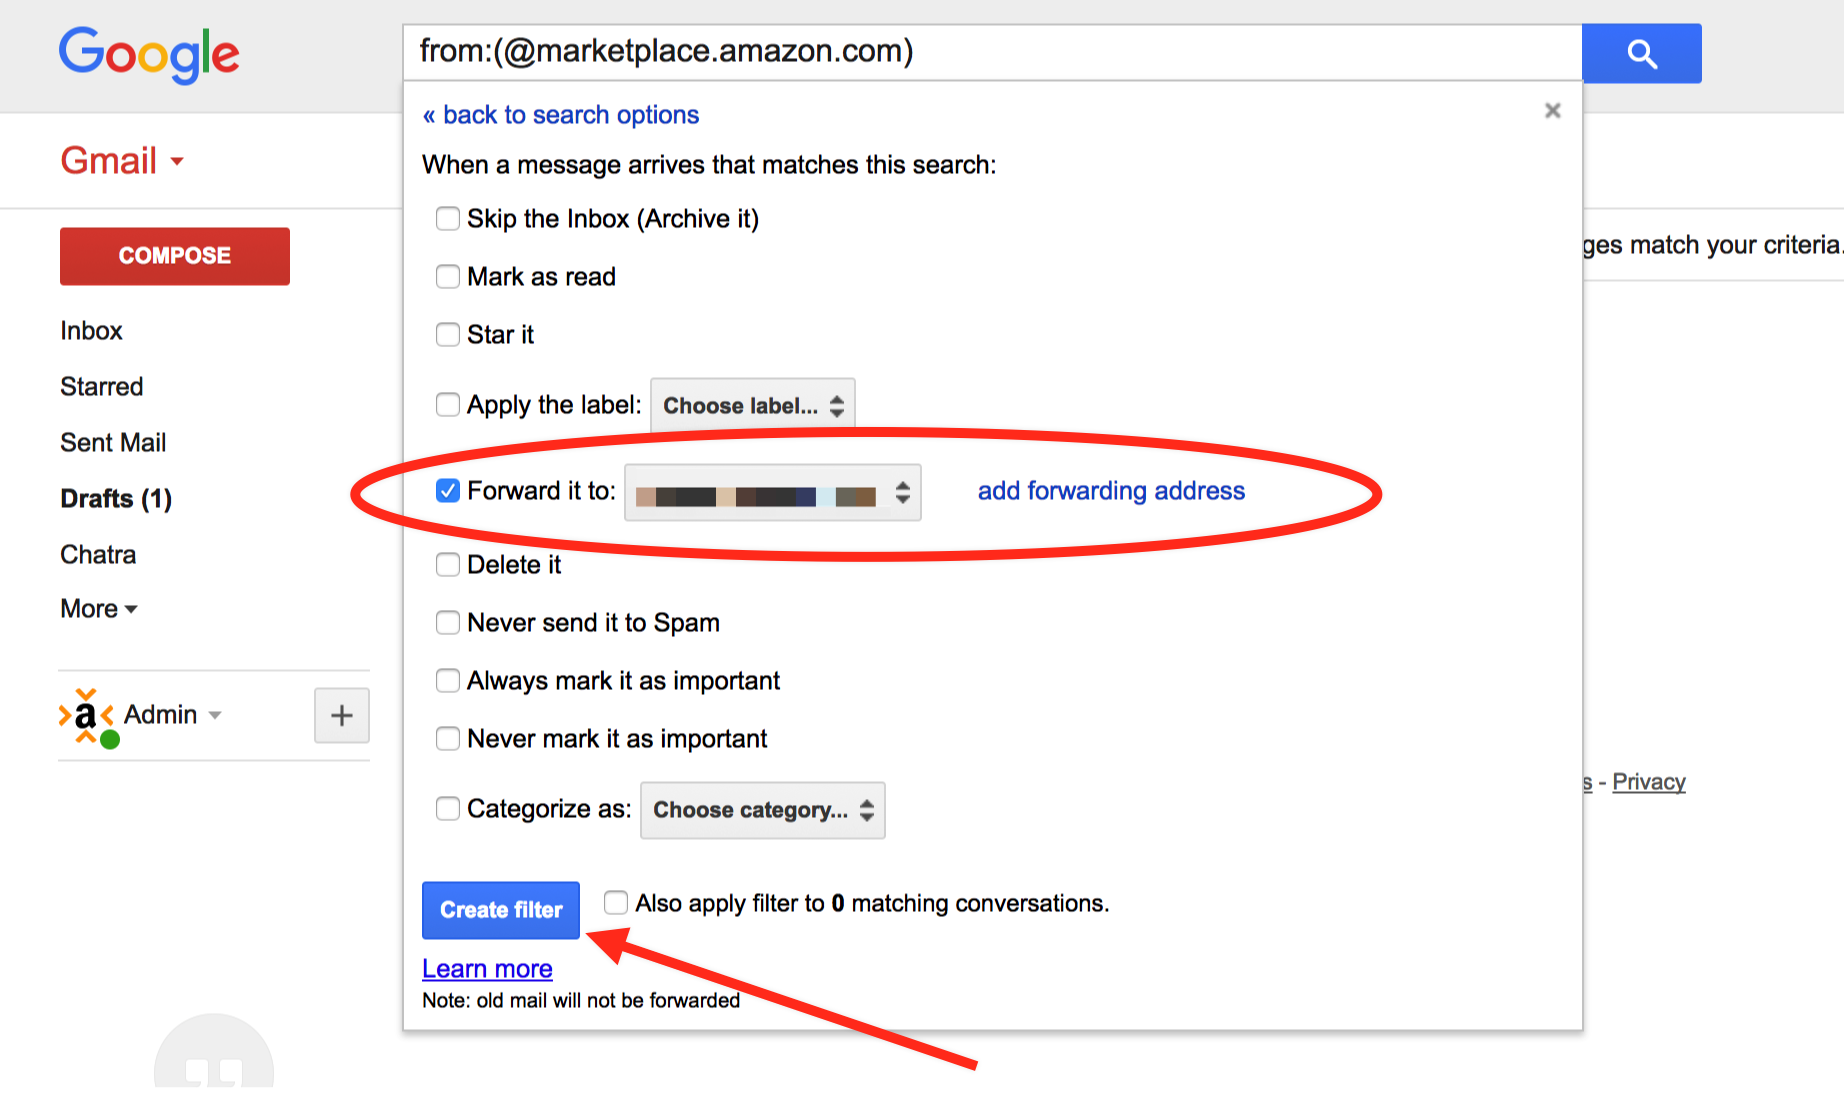
- On the final step choose Forward It action and choose your confirmed drop2amz address you added on step 1:
Now buyer email forwarding should be configured – however make sure you receive your first buyer email in drop2amz Mailbox